Pages

Saturday 30 January 2016

Modified Mabel = Happiness

I've made myself quite a few Mabel Skirts and I really love the shape of them, and how easily they fit in to my wardrobe. That said, I don't love the waistband, and probably half of the Mabel's I've made have ended up in the charity pile as the waistband has ended up too big.


The pattern has a simple waistband that you sew to the skirt, but with no elastic involved my first ever Mabel was just too big in the waist. To counteract this, I would sew some clear elastic between the waistband and waistband facing and sometimes this would really work well, and other times my waistband would still be stretched out and too big. I really have NO idea why sometimes it worked and sometimes it didn't...that's sewing for you. But when I fluffed my beautiful butterfly ponti I was ready to put the Mabel away for good - which is a problem as I still have quite a bit of fabric in the stash for this very skirt.

After sewing a few Lady Skater Skirts and attaching a 5cm wide elastic waistband my love of the wide elastic waistband grew.  Why couldn't I do this for my Mabel Skirts -- after all I have a few RTW ponti pencil skirts just like this. It's only taken 2 years, but my brain finally got there in the end!


In order to change the pattern piece I just added 10cm to the top to account for the 5cm elastic and 5cm to turn it over and then stitch it down. In hindsight, and now that I think about it it probably needs a bit more added as turning the fabric over would take maybe 1cm so the skirt is a smidge shorter than I would like.


To make this new "waistband" I sewed a loop of 5cm elastic tight enough to fit my waist, but not so tight that it would be painful. I've found that different types of elastic will make the loop bigger...or smaller  I like "soft elastic". Then I just overlocked it to the inside of the waist, turned it over and stitched it down with a zigzag to keep it from flipping over.


And the verdict? I wore this skirt to work yesterday after finishing it the night before (it took an hour to cut out and sew). It was VERY comfortable - much more comfortable than my "clear elastic waistband sandwich method".  In fact I also wore it again today for a 2 hour car trip up to Newcastle and it was pretty comfortable to sit in. My only change for next time will be to add a bit of length to it. As it is it sits just above my knees, and I prefer this type of skirt to sit on the middle of my knees.


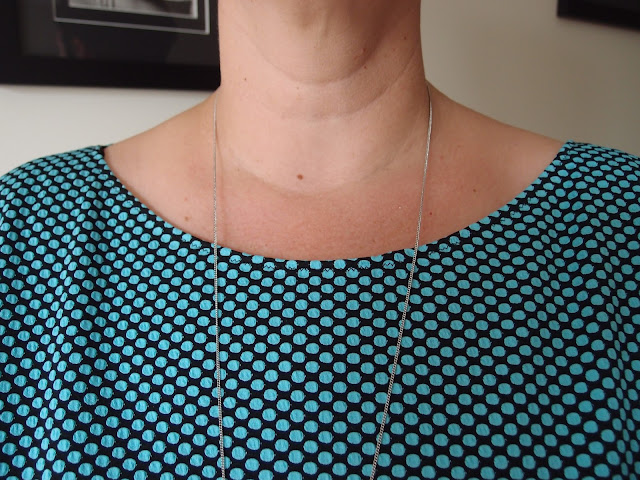
The fabric was bought from my local fabric store - My Hung in Parramatta. They stock a lot of woven fabrics and stretchy "dance stuff" so I often walk out of there empty handed. I feel in love with this fabric though - I do love the pattern on this fabric and it only set me back $6.50/pm.  It's probably not the best fabric for a hot summers day - it's 100% Polyamide (whatever that is) and feels like (fake) wool on my skin, but I'm willing to suffer for my sewing (and something that goes so well with my clogs).


I'm going to call this a WIN and I finally feel confident enough to cut my really nice piece of ponti from Tessuti that I've been hoarding in case my Mabel waistband went belly up. I'm also now going to remake my butterfly skirt with some "back up" fabric in the stash, and I've even ordered some "denim look" Ponti from the USA to make myself a much longed for denim Mabel.

---

Pattern: "Mabel Skirt" by Colette Patterns
Size: XL, sewn with 3/8" seam allowance and lengthened by 15cm.
Modifications: 5cm elastic waistband (added 10cm to the pattern to accommodate for this), 15cm added to length.
Fabric: 100% Polyamide (???) from My Hung, Parramatta
Changes for next time: I will probably use this elastic waistband method again, it's less fiddly than what I have been doing, quicker and the elastic is pretty comfortable. Will continue to lengthen by 15cm.


Tuesday 26 January 2016

Just one more (for now) Kimono Tee

I know, I know, another Kimono Tee! To be fair I did have THREE failed (and one "meh, I'm not sure") makes between Kimono Tees.

I bought this fabric from Tessuti after a solid hour of browsing (they are at the end of their sale so there's not a lot of jersey left in store). I was almost going to walk out empty handed but that would just be silly,wouldn't it! I wasn't sure about this fabric at the time, but now that it's made up into a top I really love it!


I've felt that the size for my last three tee's (here and here) has been a bit big so I end up sewing REALLY big seam allowances to counteract this.  Looking at the pattern I know that if I went down one whole size it'd end up being too small, so I decided to cut off 5mm off each pattern piece at the fold (making the front and back 1cm smaller respectively). I think this has worked really well; and it's also made the neck smaller so you see less of my bra strap when wearing the top.  I'm sure this is not a kosher way of doing things, but it worked.

.
Although I've complained about my method of finishing my necks on these tops I just couldn't be bothered finding another/better way to do it - so it's overlocked, stuck done with wondertape and then zigzagged. This is an "okay" method but a neckband would be better - but I think quite a pain in such slinky fabric.


The sleeves are finished in the same way as my neckline...simple simple.


I'm not quite done with this pattern. I've spotted some VERY nice fabric at a store that's near my office so I'll be procuring that fabric this week for another Kimono Tee.

---

Pattern: "Kristen Kimono Tee" by Maria Denmark
Size: size 3XL (no seam allowance added); with size 4XL at the shoulders
Modifications: 1cm removed for the CB and CF
Fabric: Ondula Fresh from Tessuti (97% Viscose + 83 Spandex Jersey Knit).
Changes for next time: maybe I'll forgo the use of Wondertape; and maybe try sewing it with a neckband.

Saturday 16 January 2016

Two more Kimono Tees - it's LOVE

As soon as I finished my (very) wearable toile of my new Maria Denmark Kimono Tee I raced over to Tessuti in Chatswood to procure myself some nice t-shirt fabric. I was really REALLY wanting a nice black t-shirt to go with my Lady Skater Skirts; but as is always the way when fabric shopping something else also caught my eye...so now I have two brand new tees.


The black tee is pretty much what I was hoping for; though the neckline does not look as good (nor is it finished as well as) my wearable toile. D'oh. I think the use of my beloved Wondertape to turn the neckline under (rather than pinning) makes the zigzag stitch lose it's stretch (and thus makes the neckline prone to stretching out) and one side of the neckline isn't stitched down quite right. I'm going to go the extra step given in the Mandy Boat Tee and sew the little dart thingy at the shoulder seam to tidy things up and bring the neckline in a bit as it's a smidge to big (on both tops).


As threatened with my first try at this pattern I sewed the sides up at the hips with a larger seam allowance to make it more snug in that area. As I intend to wear this top with floaty skirts a floaty/loose top will not do and I don't like tucking tops into pants/skirts as it doesn't suit me.

The fabric is called Hashtag Black from Tessuti and it is a very nice 92% Viscose +  8% Spandex Jersey Knit. It was really nice to sew with and irons up easily. So all in all I'd call this tee a win, though I only 90% love it does to aforementioned neckline issues.


As I was looking around the store this LOVELY fabric (Italian printed 97% Viscose + 3% Spandex jersey knit - swoon) caught my eye and it would've been rude to leave it behind (plus it's Tessuti sale time so spend spend spend)! This type of print is right up my alley and I adore it. I have enough left of this fabric to make another tee when this one dies (planning ahead).


The same comments apply to this as for the black shirt - not 100% happy with the neckline and will do the little dart thing to bring the neckline in a bit (though it's sewn better than the black one...) and will make my next Kimono Tee sans Wondertape and see how we go. I also sewed this with a wider seam allowance on the side seams and like the way it fits (though had to go and BUY a denim skirt to wear with it as I don't have one).


I think this top would work well extended into a dress so I'm going to give that a go. We're going on a short cruise holiday in March and I think that sort of dress would be perfect for sipping cocktails besides the pool. I'd also like to figure out how to extend the sleeves to make it something I can wear in cooler weather.
----

Pattern: "Kristen Kimono Tee" by Maria Denmark
Size: size 3XL (no seam allowance added); with size 4XL at the shoulders
Modifications: sewn a larger seam allowance at the hips - about 1.5cm.
Fabric: Black: Hashtag Black from Tessuti (92% Viscose + 8% Spandex Jersey Knit). Patterned:
Fantasia (Italian printed - 97% Viscose + 3% Spandex jersey knit)
Changes for next time: forgo the use of Wondertape; and maybe try sewing it with a neckband.

Friday 15 January 2016

Seamwork Wembley Cardigan

I'm posting this a bit out of order as it was made before Christmas. That aside, I had such high hopes that the Seamwork Wembley Cardigan would fill a large, cardigan-shaped hole in my cupboard, but alas it was not to be. This make is a big fat, ill-fitting fail.

This is the third toile I made of this pattern - the other two ending up in the bin. To be fair, I was sewing this whilst off sick, so I think the other two fails were the fault of my fuzzy brain. This one however, is just ill fitting and not very comfortable to wear. 


I sewed an XL - my standard size in Colette and Seamwork patterns, but I think this is a bit big - as you can see the shoulder seams are falling off my shoulders. The sleeves are also an odd length - not full length, and not 3/4 - just somewhere in no-mans-land, and a very unfaltering and annoying length in my opinion.


I'm having a major issue with the neckband also. I had trouble figuring out how the pattern pieces went together (the instructions were a bit unclear to me at this stage and a better illustration would've helped - or simplier pattern pieces) and I think matching two straight pieces together (at the back of the neckband) would have been easier than what was provided...which I don't have the brain power to explain but seemed unnecessarily complicated. All that aside, the neckband is way too loose and does not sit flat against my neck -- this is the best I can get it to look.


It's a shame this did not work out as the fabric was a nice remnant that I picked up from Tessuti in Surry Hills and it feels really nice to wear. Now that I look at the Seamwork website again alot of my issues are evident in their photos...you just have to really look for them.

-----

Pattern: Seamwork Wembley Cardigan
Size: XL, sewn with 3/8" seam allowance
Modifications: none
Fabric: Tessuti
Changes for next time: nothing, I won't be making this again

Tuesday 12 January 2016

Maria Denmark's "Kristen Kimono Tee"

After making sooooo many skirts (both of the pencil and a-line variety) it seemed about time to try my hand at making a t-shirt to go with all those skirts. I had downloaded the free (if you subscribe to her newsletter) Maria Denmark "Kristen Kimono Tee" about 18 months ago so thought it was possibly time to whip one up.


Sadly my first attempt was too snug as I didn't read the instructions prior to cutting out my fabric. If I had I would have realized that the pattern does not come with seam allowances included...ugh. If I had added the 1cm seam allowance as suggested I think the top would've been ok, but now it resides in the bin. For some reason I didn't have the PDF pattern on my computer at home, so I unsubscribed to the newsletter, re-subscribed and got myself a new copy of the PDF pattern. It would appear that since my first download of the pattern Maria Denmark has added more sizes to the larger end of the size specturm which suits me. After laying the old pattern over the new pattern I decided to cut a 3XL (leaving it at 4XL at the shoulders to give me more room in the sleeves). I decided that the 3XL would be big enough without me adding seam allowances as it is quite a bit bigger than her previous biggest sizes.

I am pleased to report...WE HAVE A WINNER!


This pattern was only intended to be a toile, but I decided to sew it up "properly" to make sure I could do all the steps without faffing it up. I decided not to add a neckband as frustratingly the pattern does not include a pattern piece for the neckband, you have to draft one yourself - life's too short for that!  I decided to treat the neckline the same as the Mandy Boat Tee - simply by overlocking the back and front neckpiece, turn under (with the help of Wondertape), zigzag stitch and then stitch up the shoulder seams. This has worked really well, but in the past these type of neckbands have stretched out and I'm not sure why. My inner OCD wants to give the neck a good tug to see if it'll stretch, but I'm trying to hardest not to do that!


The seams on the sleeves were also treated in the same way - finished before sewing up the side seams. I'm pretty happy with how they look and they feel very comfortable.


The top is also sitting very well at the back neckline -- though I think the neck is a smidge wide as my bra strap does show at the shoulders.  I don't think it's such a big deal though...not enough to think about how to fix it.


I like the back view of the tee - though next time I'll make it marginally tighter at the hips so it doesn't just "hang" - I think that's a better look to go with my A-line skirts.  There is a bit of pooling at the curve of my back - but I don't mind that at all...I like that the tee is loose at the back as I don't care for fitted tops.


I decided that I liked this toile so much that it was worth hemming it and sewing in the overlocking threads so I can actually wear it. Next up I hope to make a version in black.

----
Pattern: "Kristen Kimono Tee" by Maria Denmark
Size: size 3XL (no seam allowance added); with size 4XL at the shoulders
Modifications: none
Fabric: some sort of knit from Addicted to Fabric (Canberra)

Me in Love Sewing Magzine (!!!)

Part way through last year I received an email from Love Sewing Magazine (the Australian, not the UK edition) asking if I would like to appear in their magazine. "Sure", I said, "why not"...and then I promptly forgot about it until a fellow Spolette told me I was in their copy of the November 2015 magazine.


Unfortunately the magazine is almost impossible to find and after visiting about 10 newsagencies I gave up. A big thanks to another fellow Spoolette, Steff, who found a copy at her local newsagents and picked it up for me. So here we have my 15 seconds of fame...


I think what they wrote was very nice - they made me sound like I actually know what I'm doing!

Sunday 10 January 2016

Just one more Lady Skater Skirt

Despite having come home from Japan with a suitcase full of fabric, I actually didn't buy anything that was summer-weight (it's winter in Japan so there was only winter fabric around). A quick trip to Lincraft to pick up a pattern saw me come home with this pretty mystery fabric. It feels a bit like neoprene, but nowhere near as thick.


No surprise, but I made myself another Lady Skater Skirt. The fabric has the potential to be hot and sweaty if made into anything fitted, but as a floaty skirt....no worries! I wore this out to dinner last night and felt great in it. Nothing to say that hasn't be said before on my other posts (here , here and here). I left the skirt unhemmed as it sits better that way, so all up (cutting time included) this took about an hour to sew up.


Most excitingly I got to use my new purchased glass-head pins purchased from Kyoto's gorgeous Misuyabari Needle Shop. These needles are handmade and they are simple, but lovely.


I love these skirts, but I think I now need to move on and find a t-shirt pattern to go with them as none of my RTW tops are quite right; or quite fitted in the right way for such a skirt. Any recommendatins? I think of the Maria Denmark Kimono Tee?

----

Pattern: "Lady Skater Skirt" by Kitschy Coo
Size: 8, sewn with 3/8" seam allowance
Modifications: elastic waistband and skirt lengthened by 7.5cm from the original pattern piece
Fabric: some sort of knit from Lincraft (Parramatta)
Changes for next time: I wouldn't change a thing <3

Friday 8 January 2016

Fabric haul from Kyoto

Dave and I have *just* returned from 2 and  a half weeks in Japan, where we spent the bulk of our time in Kyoto. The beauty of staying put in one place for so long is the chance to revisit places you REALLY liked...such as my beloved Nomura Tailor. I went there about 5 times, making purchases three of those time and just perusing all the goodies the other times. It was...bliss!


There are two Nomura Tailors in Kyoto, one on Shijo Dori (the bigger store with ALL the fabric), and a second smaller store, around the corner in one of the arcades at the end of Nishiki Market (there are two arcades parallel to each other and I cannot remember which one it is in). The smaller stall sells some haberdashery and quilting items.

Needless to say I spent most of my time in the big fabric store...with most of that time up on Level 2 where the knit fabric lives.


I bought this lovely wool (?) for what I hope will become a lovely "coatigan" - B6244. The pattern has a shawl collar that shows the underside of the fabric (the lighter side) and I think (hope) this will work out really well). I hope not to hem the shawl part of the garment, rather use the selvage; or stitch it so I can fray the edges.


Next up is this cozy knit that I see as an Oslo Cardigan. I have no idea of any of the fabric content on my purchases...the tags being in Japanese...but they all feel nice


Nomura Tailor have a few different patterns made up, including the little cape in this photo. I tried it on and it fits (pretty much) so then I set about finding a fabric that I could use to make it. Nomura has HEAPS of wools, mostly in plaids, but I knew matching the plaids would make my head explode, so I went for this lovely blue fabric. I spent about 2 hours choosing this fabric - my head exploding at ALL the choices on offer. After some sign language I ascertain the pattern is from this Japanese pattern book so I purchases that too (hopefully I'll be able to decipher the pattern, otherwise this material might become something else, like a Seamwork Camden Cape).


Initially I had thought this fabric would work for the B6244 coatigan, but it has quite a bit of stretch so I walked out of the shop and left it behind after fondling it for about an hour. I then went back a few days later as I thought the fabric so was nice plus super soft and cosy that it deserved to come and live in Australia with. More agonising ensured about which colour - black, navy blue or grey. That decision took me hours also! I have no idea what this will become yet...hopefully a nice cardigan or coatigan if I can find a good pattern (suggestions welcome).


I bought a similar fabric to this back in February and it became a Linden Sweater which I think is a great way to show off the double sided fabric. This fabric will suffer the same fate...with the polka dots serving as the contrast fabric on the bands.


And last, but by no means least, is 1.5m of this lovely fabric that I found in their remnant bin - the colour combination is olive and mustard. Delish. The remnant bin at Nomura can be the source of hours of happy rummaging...trust me, I know. I see this becoming a Mandy Boat Tee - it has a bit of a "wool" feel to it, so it will be a nice winter top.


I love everything I bought and I'm glad I have visions for some of it straight away. I also loved that with JAL we had 50kg luggage allowance EACH so I could go as crazy at the bank balance would allow with my fabric shopping.