Pages

Sunday, 16 August 2015

Seamwork's Oslo Cardigan

When we in Melbourne last weekend for Frocktails a few of the Melbourne ladies were lovely enough to chauffeur a few of the out-of-towners around to some Melbourne fabric shops. I was very excited to tag along as I strongly strongly believe (very strongly) that Melbourne's fabric shopping game sh!ts all over Sydney's. Melbourne seems to HAVE so many great fabric shops. We visited Rathdowne, Darn Cheap Fabrics and the Cloth Shop at Ivanhoe.

It was at the famed Darn Cheap Fabric were I picked 2.5m of the fabric below, initially ear-marked for a Lady Skater Dress, but when I got it home I thought perhaps a cardigan might be better for this slightly thicker cotton/poly/spandex mix. The fabric is sort of quilted...with material on the front and back that are stuck together somehow. It's quite cozy and feels lovely to wear.


The Oslo Cardigan is one of the first patterns from Colette's Seamwork Magazine. I don't pay for a magazine subscription (if you do the patterns are free) so this pattern cost me about $6 - pretty cheap really. I bought the pattern AGES ago but bulked at putting the PDF together as it's about 1000 pages long. Like the Colette PDF patterns the page margins are 1" on each side which seems a bit...wasteful. I was sick all of last week however so had plenty of time to stick this thing together *grumble grumble*.

The pattern is an "oversized" cardigan with sleeve cuffs and a collar that goes the entire way from hem to hem. I sewed a size XL leaving the length at the 3XL as I'm tall-ish so didn't want a short short cardigan to wear with skinny pants.  It fits as expected (it fits = YAY) although I am wondering if I could size down next time...the only thing stopping me is that there is quite a big difference between each size - so going down just one size could make it too small.


There's not much to say about this make really. I read through the instructions before starting and referred to them again only when it came to attaching the collar - just to make sure I was getting things right. It was a very easy garment to sew and (for a change) I had no machine troubles so everything went swimmingly.


The pattern piece for the cuff was ridiculously long so I decided to half the length of the cuff, and even then the sleeve is still too long for my liking, but I guess that goes along with the whole "oversize" thing the Oslo has going on. Next time I will stick with my shorter cuff, but take about 1" off the sleeve piece.


The only other change I made to the pattern was to tack down the collar piece as it would not sit flat due to the bulkiness of the fabric and it was making me feel a bit messy and swamped by the garment. I put in a few machine stitches at each hem and at the back of the collar to stop it flipping up and standing at attention. I feel a lot more tidy in this cardigan now and less swapped by how big it is.

Just gotta say though that this cardigan desperately needs pockets -- how would I go about that doing you think - robbing the pockets from the Tessuti Jacket perhaps?


Back view...just for kicks. I think the cardigan does look big in this photo, but again that is the style and in a more drapey, snuggly fabric I think it would be OK? Still cannot decide if should size down or not?


...and side view...you can see how "drop shouldered" this style is...


When I first put this on my thought was "uh-oh, I've made an old man's kimono-style bathrobe" mainly due to the pattern on the fabric and how stiff the fabric makes the collar. That said, I still wore the cardigan out today for lunch and a walk in the park and whilst it is pretty comfortable I'm not sure how I feel about it, or if it's flattering. I had visions of a Metalicus type garment when I bought this fabric but I'm pretty sure I am not challenging Metalicus at all. Hmmm...


Pattern: Oslo Cardigan by Seamwork Magazine
Size: XL with the length left at size 3XL
Modifications: reduced the length of the cuff by half; stitched down the collar at the hem and back neckline to stop it flipping up.
Fabric: Cotton, Poly, Spandex from Darn Cheap Fabric
Changes for next time: add in some pockets and try it in a more "jumper-like" material. Maybe next winter though...

Monday, 10 August 2015

A Gabby Dress for Frocktails

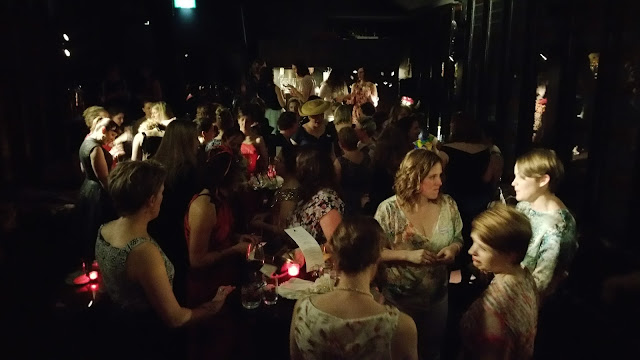
On the weekend was the long-awaited Frocktails shindig down in Melbourne (sew a frock and come drink cocktails with like-minded souls). I had been looking forward to my weekend away in Melbourne ALL year and decided to take a few extra days off work and make a real long weekend of it.  Just my luck though I came down with a cold the day after arriving in Melbourne which had escalated in to a full blown cold on the night of the party. Wah! 

After having six attempts at coming up with a wearable dress for the night there was no way I was going to miss Frocktails, so I took my Codral, gargled some aspirin and dolled myself up for the night....


You've seen this fabric before - in the toile for the Lady Skater Dress that I made recently. The fabric is a lovely ponti from Tessuti which I had always intended my Frocktails dress to be made out of (I initially bought 2m to make a Casual Lady Dress which my overlocker ate, so I made it again from the remaining 1m...which my overlocker also ate - turns out the needles needed to be changed)! The fabric is comfortable but I think the lace print makes it look a little bit fancy.


There's not a lot to say about this dress that I've not said before. I made the dress with short sleeves as I remember being SO hot at the Sydney Frocktails last year and didn't want to overheat again this year.


The dress is worn with some big, bright beads bought in Bali a few years ago.  The bag is a cheapie from Colette (matches the beads as I'm all about matchy matchy), stockings are from Sonsee, shoes from Paul Dane and the sparkly cardigan is from Sarah Jane in Newtown. The cardigan is made from wool so was warm up to race up to the venue in without donning a big coat. I was really comfortable all night and my shoes only started to hurt as I walked back to the hotel - not bad for brand new shoes.


All in all it was a great night though I only managed to stay for 3 hours before my cold got the better of me. I was a bit out of it all night and SOOOO tired so my conversational skills were really lacking which is a shame as 51 people attended and I'd only met a handful of the ladies I'd wanted to say HI too. Oh well..there's always next year...


Pattern: "Gabby Dress" by Tessuti
Size: M, sewn with 3/8" seam allowance and left at a size L at the shoulders. The hem is 1"(behold my knees people)!
Modifications: none
Fabric: Ponti (again) from Tessuti (again)
Changes for next time: none, though I think it's time to try this dress again in a woven, I have some nice soft silk/cotton that I bought in Malaysia that I'd like to bust out of the stash.

Sunday, 2 August 2015

Lady Skater - Toile and Trouble

About a year ago I made a toile of the Lady Skater Dress bodice. The result was not pretty. If we put aside that the fabric nearly broke my overlocker, my sewing machine and my spirit (plus three sewing needles) the bodice was just too small and the fabric was so un-stretchy it was like trying to get in to a top made of steel. I blanked the pattern from my memory and threw it in the bin.  However, a few weeks ago I woke up thinking that I MUST make another toile...this time of the whole dress, not just the bodice. I felt that this time it would be perfect (even though nothing about my body or machines had changed).

What you see here is my second full toile of the dress. The first looks exactly the same (same material) but it just didn't fit well at all (though it did fit my body so hurrah)! First time around I made the straight size 8. The bodice was too long (as the weight of the skirt really pulls the bodice down a lot) and there was something funky happening with the sleeve heads - they stuck out off my shoulder in a very odd way - like the shoulders were just wanting for the insertion of shoulder pads.  I also sewed the sleeves in backwards, so whoops.


With my second toile I cut the bodice shorter by two sizes (so now it's a size 6). I think I could go a tad shorter as it's not quite sitting in the right spot and is bunching up above my butt (I think I probably have a sway back and, coupled with my large bottom, this is exacerbating the bodice length issue). I don't think the back view of this dress is all that flattering on me it shows all my lumps and bumps, but I cannot see it when I'm wearing it so...whatever!


For the second toile I cut the sleeve head and arm hole to both a size 7. I still think the top of the armhole is still sitting off my shoulder too far so I might trim the pattern back to a size 6 just at the top of the shoulder - going for a straight size 6 all around would make the armhole too tight I think. I have been obsessively looking at every picture of the Lady Skater Dress on the Internet and Instagram and it seems like the shoulders fit everybody else in the whole world perfectly. Not quite sure what the problem is with me.


The sleeve is also a bit baggy with some pooling of fabric near the bust and my arm. I had no idea the back of the sleeve was so baggy until I saw this photo. That said...I don't need (nor want) my bodice to be skin tight so I'm willing to live with it. I've been getting lazy with my sleeve hems and I finish them before sewing up the side seam of the dress - it's a lazy way to do it, but it's much easier for me. I've taken to sewing in the overlocking tail back into the seams though so that they don't start to unravel when I just snip them off - so that cancels the laziness of finishing the sleeve hems the easy way


Not much to say about the neckband. I finished it as the pattern suggests - sew up one shoulder, attach the neckband (which I like to pull nice and tight, but not too tight) and then sew up the second shoulder. I did cut the neckband longer that the pattern piece as when I made my first bodice toile there was NO WAY the neckband was going to come anywhere close to fitting the neck. Easy peasy!


I totally loved this dress until I fluffed up the hem. I couldn't get the hang of getting an even hem on such a big circle skirt. In the end I just went for it, and f**ed it. I tried to unpick the part of the hem I'd done (half the skirt) but it was impossible to unpick such narrow stitches on spongy black ponti. So I just went for it again and overlocked off the botched hem. Of course only half the skirt was hemmed, so now it's uneven and it drives me NUTS! It is hemmed however as my sewing friend Susan offered to do the hem for me - which I took her up on. It was good to see how a professional does a hem like this and I still have my unhemmed first toile that I can now practice on.


Both the bodice and skirt fabric are Pontis from Tessuti. The bodice was made from the scraps of two ruined dresses that I'd tried to make for Frocktails (I've botched SO much fabric trying to sew for Frocktails which is coming up in Melbourne next week that I don't want to add up how much it's all cost me) and the black ponti from the skirt is from my stash. I think the softness, and good stretchiness, of the fabric helped a lot in getting a dress that fits me (the ponti for my first bodice toile was quite thick and not very stretchy = fail).


So there you have...a very wearable toile if I can just get past how wonky the hem is (which I probably can't as I'm OCD about that sort of thing).

Pattern: "Lady Skater Dress" by Kitschy Coo
Size: size 8
Modifications: bodice shortened to size 6 and the sleeve head and armholes reduced to a size 7. Left of the suggested sleeve cuffs. Also finished the sleeve hems before sewing up the side seam of the dress - it's a lazy way to do it, but it's much easier.
Fabric: Ponti from Tessuti
Changes for next time: shorten the bodice by one more size, reduce the top of the armhole (at the shoulder) to a size 6